Table of contents
- Tip n°1: Environment variables syntax depends on the shell you are using in your job
- Tip n°2: Do not use your repository GITHUB_TOKEN in tasks that need to trigger another workflow.
- Tip n°3: Assign information from the event triggering a GitHub Actions workflow to a PowerShell variable.
- Tip n°4: Enable debugging logs to help you understand what is going wrong in your workflow
I recently played a bit with GitHub Actions and as I have spent some time running again and again my workflows to understand what what going wrong I thought it could be interesting to share what I have learned especially concerning environment variables and contexts.
🗨 Disclaimer: Although I have some experience with Azure Pipelines, I am still learning GitHub Actions so I do not pretend to know everything about them nor do I never make mistakes when writing about them. Feel free to correct me in the comments if you think I am wrong about something or if something that I show can be done more effectively.
Tip n°1: Environment variables syntax depends on the shell you are using in your job
As you know a GitHub Actions workflow is composed of different jobs where each job is a set of steps that execute on the same runner. As a runner can be hosted Ubuntu, Windows, MacOS or even another operating system (if you host your own runner) the shell that will execute your commands will not be the same by default depending on the runner you choose. For instance if you are on a Ubuntu GitHub-hosted runner, by default the shell will be bash whereas on a Windows GitHub-hosted runner it will be PowerShell (I think we don't say PowerShell Core anymore but I am speaking of pwsh not the old Windows PowerShell of course).
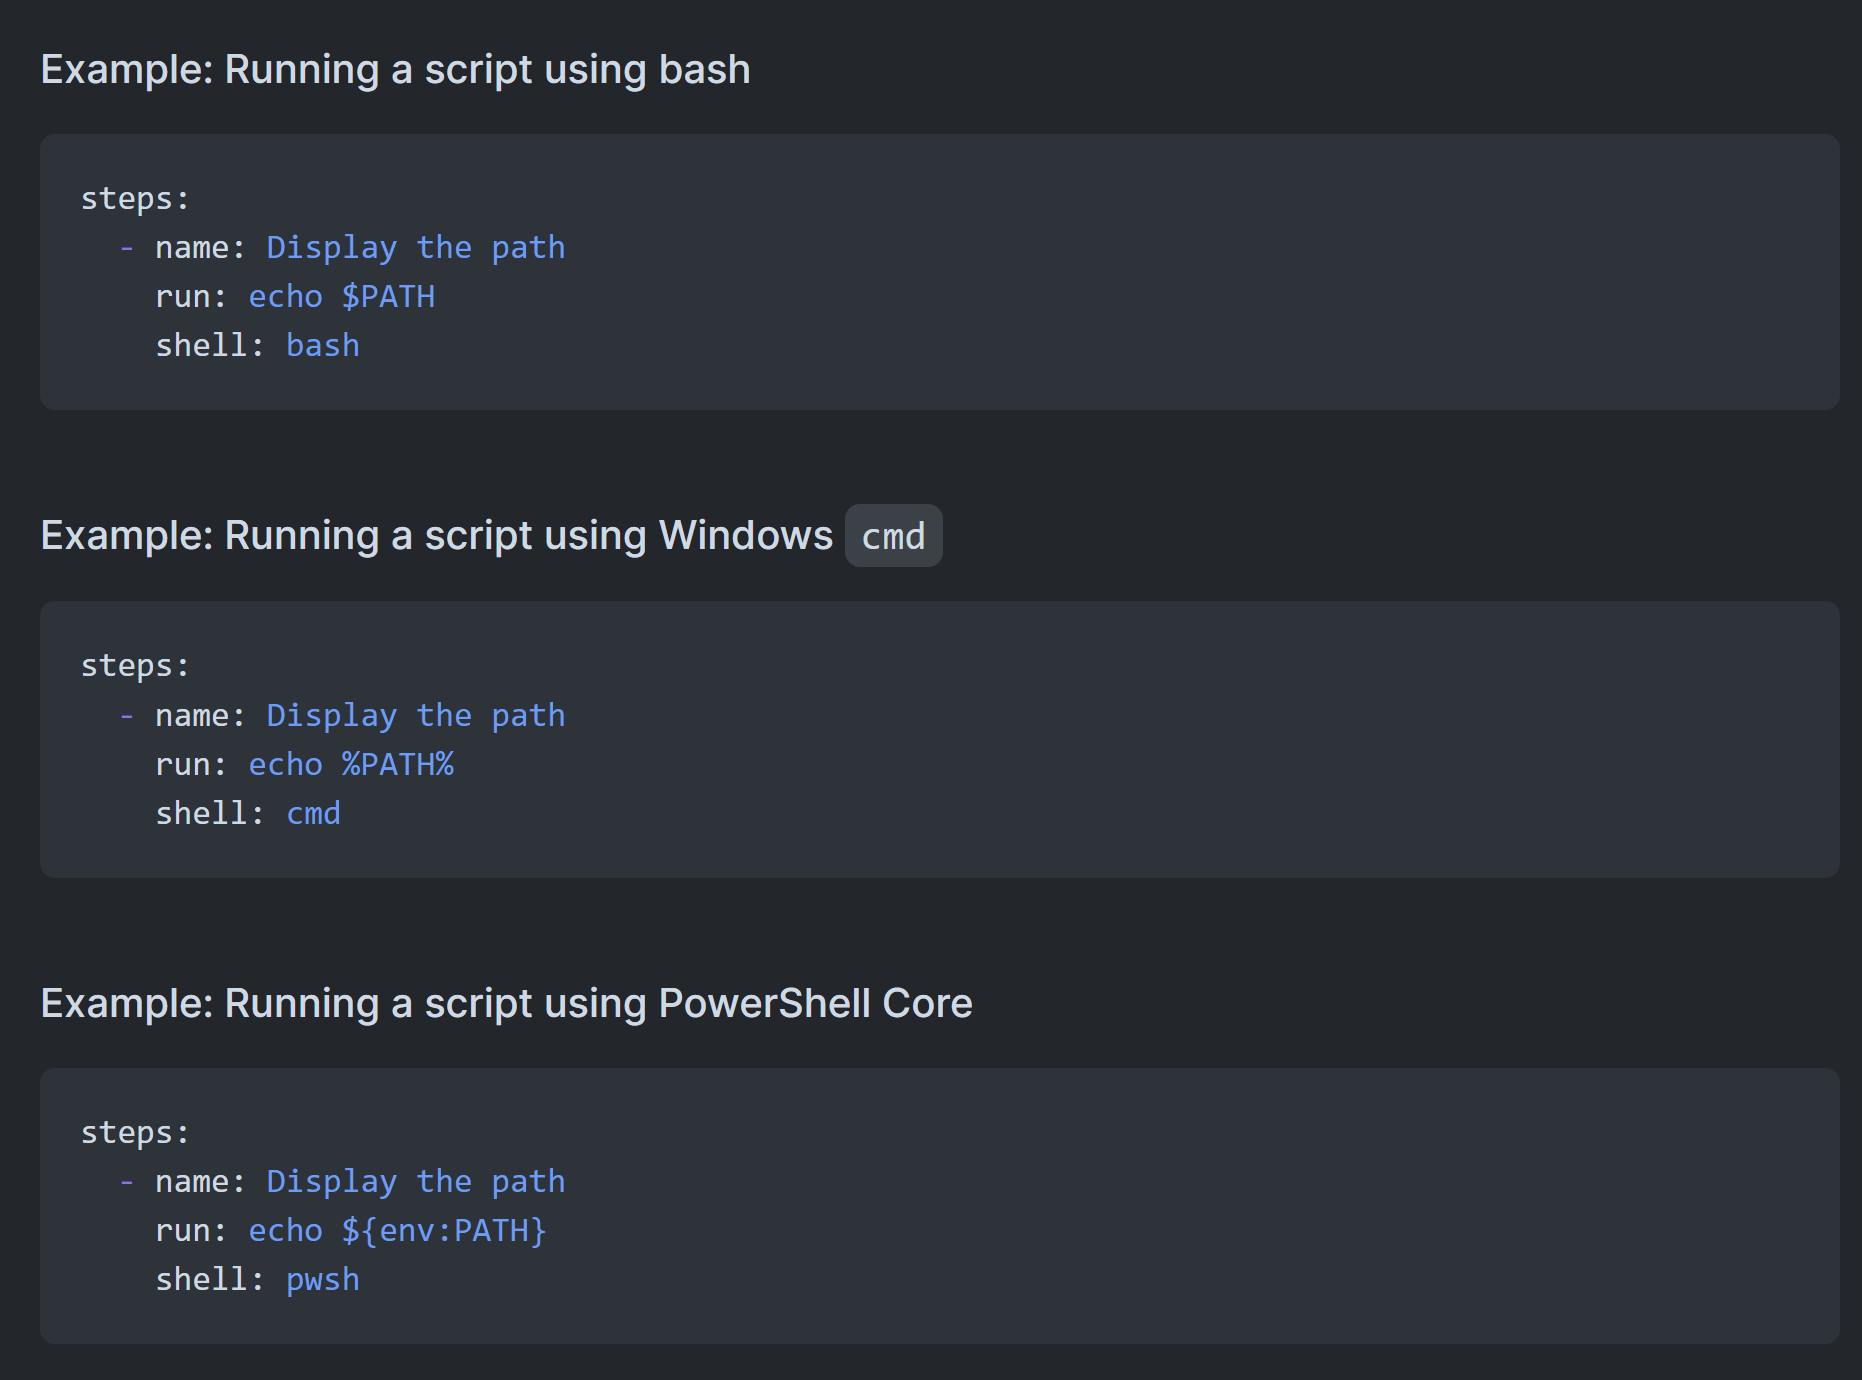
This is really important to know because depending on the shell used, the syntax to use an environment variable in a script is different as you can see on the documentation screenshot below:

🗨 When I am talking about environment variables here I am referring to GitHub default environment variables (for instance
GITHUB_EVENT_NAMEwhich the name of the webhook event that triggered the workflow) and to custom variables you set in a workflow. The syntax for environment variables you just create and use in a shell script does not change of course.
The documentation briefly explains the syntax to use depending on the shell here but you can easily miss it like I did. In fact most of the GitHub Actions examples you can find are in bash so if you use them as-is without paying attention to the shell you are using, you will probably get it wrong. I lost a lot of time trying to figure out why my scripts were not working on a Windows runner so I hope knowing that you will avoid to do the same.
Tip n°2: Do not use your repository GITHUB_TOKEN in tasks that need to trigger another workflow.
The GITHUB_TOKEN is a secret you can use in your workflow to do some actions on your GitHub repository like pushing a tag, creating a new release, creating an issue... It is very convenient because it allows you to automate in your workflow many things for your GitHub repository using built-in actions or the GitHub REST API.
🗨 Be aware that internally GitHub Actions is a GitHub App that is installed on your repository when you start creating GitHub Actions workflows for this repository. That means the token represented by
GITHUB_TOKENin your workflow is a GitHub App installation token that will only work on your repository workflow and that will have a limited set of permissions (but your can grant more permissions directly in your workflow if you want).
If you want to know about authentication in a workflow, there is dedicated page on the topic in the GitHub documentation. However if you read it quickly you may miss an important piece of information:
"events triggered by the GITHUB_TOKEN will not create a new workflow run"
What does this mean ? It means that if you have 2 workflows and that the first one uses the GITHUB_TOKEN for an action that should trigger the second one, then the second workflow will never be triggered. The aim is to prevent you from making an infinite loop of workflows runs triggering each other.
So imagine you want to implement a workflow that publish a release when a new tag is pushed on a repository, and another workflow that automatically tweet about your new release once it is published, how can you do that? You just have to create a GitHub Personal Access Token, add it as a secret in your repository and use it in your first workflow to create your release. This way, the second workflow will run fine when the release is published.
Tip n°3: Assign information from the event triggering a GitHub Actions workflow to a PowerShell variable.
Sometimes, in a GitHub Actions workflow we want to execute some PowerShell to do specific actions depending on information from the event that triggered the workflow. Hence having a PowerShell variable with this data could be really useful. For instance, if we have a workflow triggered by the publication of a release, maybe we need to retrieve the URLs of the binaries of this release which can be done easily if the event data is in a PowerShell variable.
The webhook payload corresponding to the event that triggered a workflow is part of the properties of the github context.
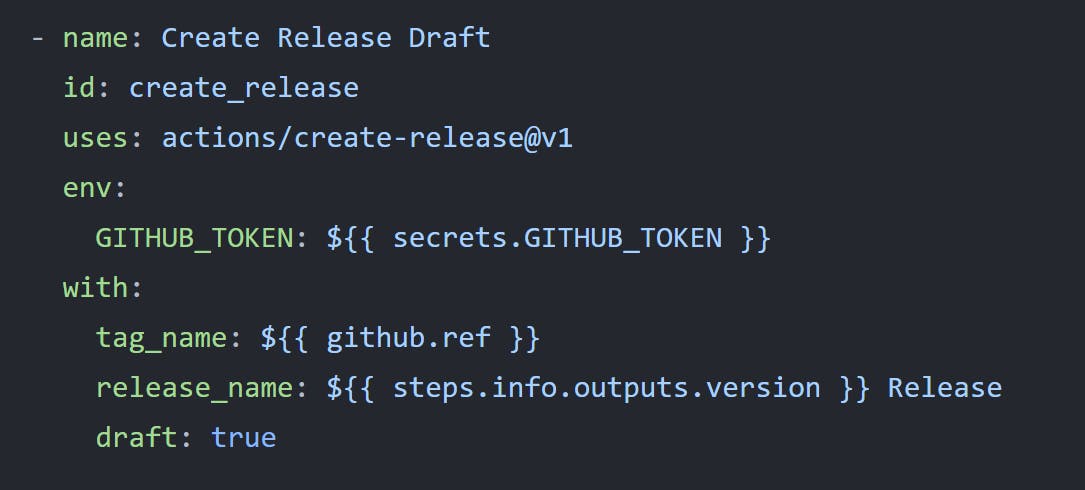
🗨 If you are not familiar with contexts in GitHub Actions, they are objects that contain information about the current workflow, job, runner or things like that. Contexts are often used in expressions to determine whether or not a step of the workflow should be executed or to set some variables as you can see in the sample below.
As you can read in the documentation, the event property is of type object which makes it difficult to query it and to assign it to a PowerShell variable. Fortunately, there are ways to do that which are based on the fact that GitHub event data is persisted in a json file on the runner file system.
First one is to use the tool jq which is already installed on GitHub's runners and that allows you to process json data. Edward Thomson has a blog post which explains how you can use jq with GitHub Actions to do that: GitHub Actions Day 12: Information about your Workflow.
Second one is to directly use PowerShell to grab the GitHub context like this: $github = Get-Content '${{ github.event_path }}' | ConvertFrom-Json. Thanks a lot Edward Thomson for helping me with this tip 😀.
To illustrate that, here are a sample of using these two ways to assign the URL of the binary published by a release to a PowerShell variable using the event property of the github context:
using jq:
$installerUrl = $(jq --raw-output '.release.assets[].browser_download_url | select(contains(\"windows.msi\"))' "${{ github.event_path }}")
using ConvertFrom-Json method in PowerShell:
$github = Get-Content '${{ github.event_path }}' | ConvertFrom-Json $installerUrl = $github.release.assets | Where-Object -Property name -match 'windows.msi' | Select -ExpandProperty browser_download_url -First 1
I did not know about jq but I find it is a really nice tool although the syntax is not that straightforward. Yet, I prefer the PowerShell way because it allows to directly manipulate an object instead of a json string. It is what I did to automate the upgrade of the Nushell winget package using GitHub Actions when a new release is published (you can read more about it in this article).
Tip n°4: Enable debugging logs to help you understand what is going wrong in your workflow
As many CI / CD platforms, GitHub Actions has the disadvantage of not being testable locally which makes it hard to debug a workflow when something is not working properly. Moreover, by default you won't see how some expressions / contexts are evaluated when the workflow run so logs will not help you figuring out what is wrong in your workflow definition.
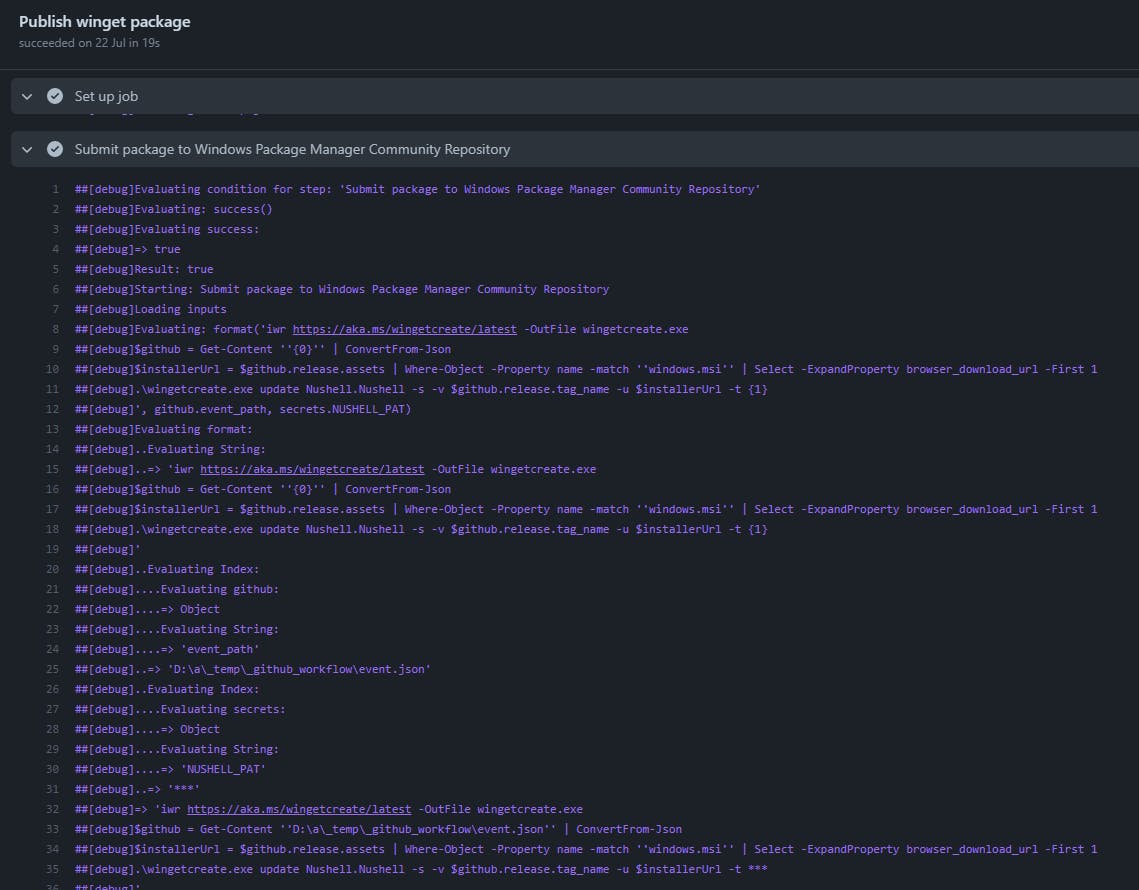
Hopefully, you can enable debugging logs for all pipelines in your repository (unfortunately you can't specify it for a specific pipeline only) by setting the secret ACTIONS_STEP_DEBUG to true in your repository. You can read more about it in the documentation but here is what it look likes in a workflow run:

I hope these 4 tips will help you build awesome GitHub Actions workflows.

