Week 3, 2022 - Tips I learned this week

I am a software developer living in Bordeaux. I am a .NET and Azure enthusiast, primarly coding in C# but I like to discover other languages and technologies too.
.NET tip of the week: the new way to add a configuration source
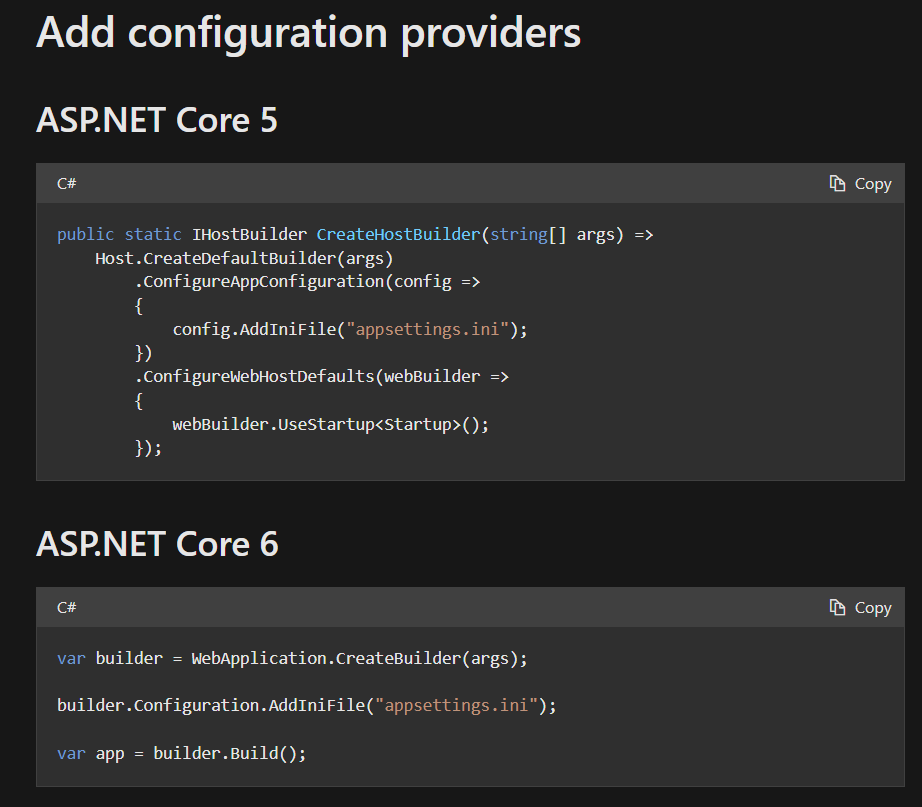
.NET 6 introduced a new way to build a .NET application using the new WebApplication and WebApplicationBuilder classes. One thing I like about it is how configuration is handled. Instead of using the ConfigureAppConfiguration method to add a new configuration source, you can directly use the Configuration property on the WebApplicationBuilder instance. You can see an example of this change on this screenshot of the ASP.NET Core documentation:
You may think this way of adding a new configuration source does not bring much apart from making the code shorter. I thought it too until I discovered that it enables you to access configuration in the builder from previously registered configuration sources. For instance, if you want to load secrets from an Azure Key Vault into your configuration, you will need to retrieve the Key Vault URI from your configuration (that you may have set in your appsettings.Development.json file). Before you would have to partially build your configuration to get the value of a setting, now you can just access it.
builder.Configuration.AddAzureKeyVault(new Uri(builder.Configuration["KeyVault:VaultUri"]), new DefaultAzureCredential());
Configuration from previously registered sources is already available because configuration sources are directly loaded once they are added. If you want to learn more about the behind-the-scenes, Andrew Lock has a very interesting article about ConfigurationManager that I suggest you read.
The VS Code extension you should try: Vite
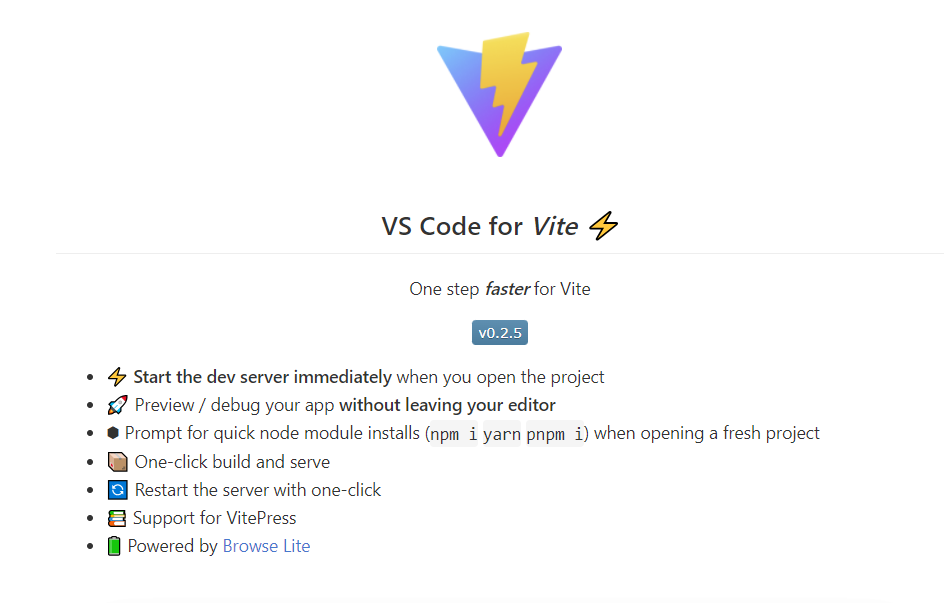
If you are developing a front-end using Vite (and there are good reasons why you should), there is a Vite extension for VS Code currently in preview.
You can see the main features of this extension below: little things that make you always more productive.
The Azure DevOps tip you did not know about: creating pull requests templates
As a developer working with Azure DevOps, you probably spend a lot of time reviewing your colleagues pull requests and what helps you to have a good context (of what problem a pull request solves or what new feature it brings) are having a work item associated to the pull request, and having a good description. You can enforce the pull request to have an associated work item by setting it to mandatory in your branch policies, but "having a good description" is not something you can enforce.
However, you can provide some guidance on what the description should tell, how it should be organized, what are the key points to verify before submitting the pull request... How do you do that? By creating a pull request template in your repository which will be a markdown file that will be automatically added to a pull request description when the pull request is created. You can read the official documentation but let me show you quickly how it works:
1- You create a .azuredevops folder in the root of your git repository
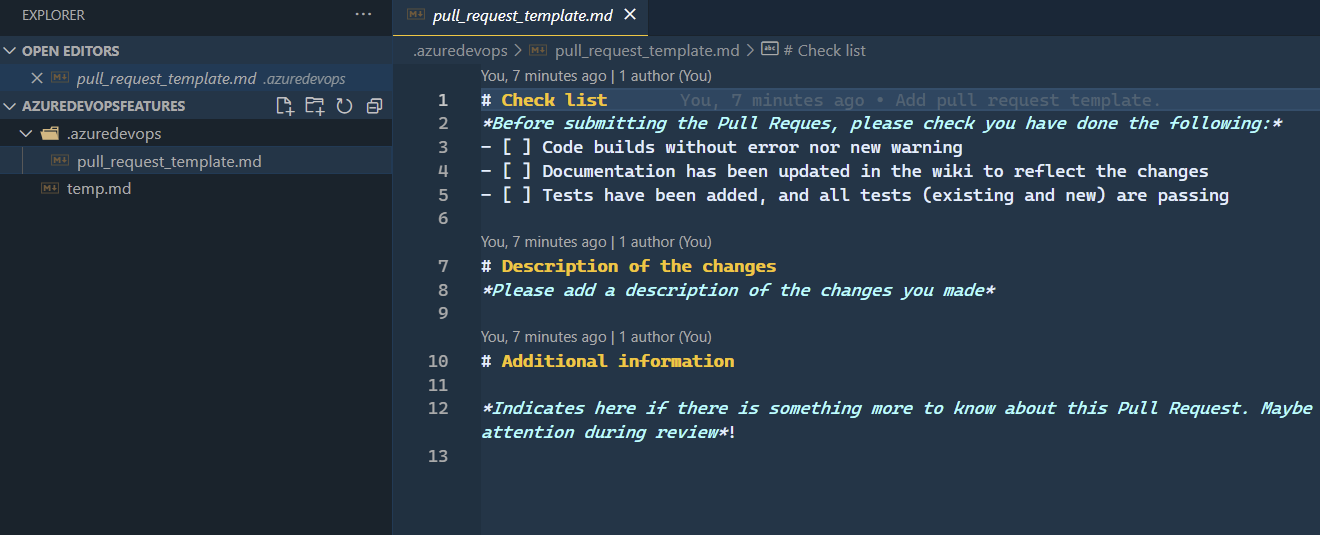
2- You create a markdown file pull_request_template.md containing the description you want
You can see below an example of a template I created:
3- You commit this file and push it in your main branch
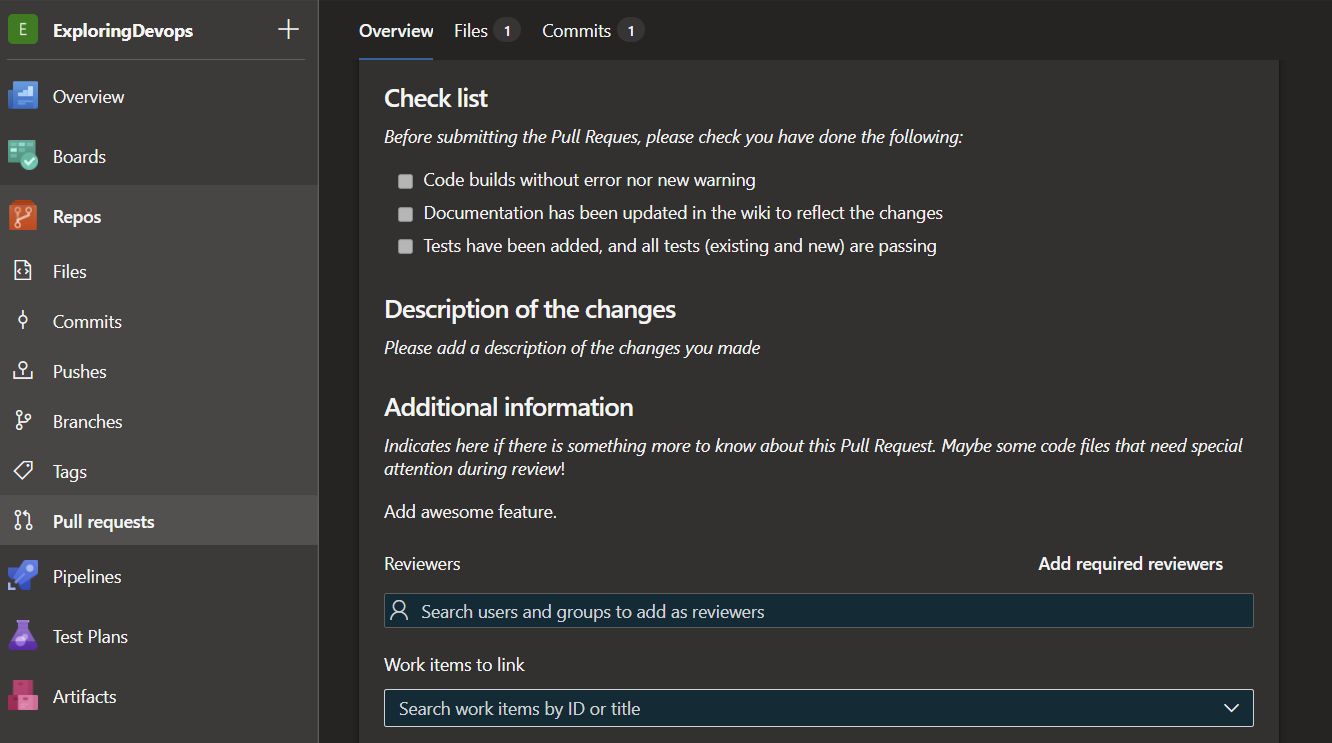
4- Now when someone creates a pull request, he will have a pre-filled description to complete before submitting his pull request
This is what it looks like for my template:
🗨 If you are using GitHub and not Azure DevOps, just know that there are also pull requests templates in GitHub.
Tool of the week: degit
Sometimes you find an interesting open source git repository that could help you save some time when starting a new project. That can be a project template or a sample, it's a repository that you want to start coding from. You can clone it or fork it but you will retrieve the whole git history and that is something that you probably don't want.
degit is a helpful tool that solves this issue. When you run this tool on a git repository, it retrieves locally the latest version of this repository without its git history. It's an npm tool so you can install it globally with npm install -g degit or directly run it using npx.

Don't hesitate to give the project a star on GitHub if you find it useful.
And that's it for this week, happy learning!